By the end of March, the car had been moved out of the old location and the drive down my narrow road was epic. Not only that but the neighbour had otherwise decided to drive up the lane as I was going down…. No problem just reverse right, well… The transmission kind of refused to “R”, turning it to a bit of a panicky moment. Anyway the neighbour managed to reverse and we squeezed past each other, she gave me the “look” (she’s nice) but I don’t think she recognised me and though “what the heck is this guy doing down MY road!” lol.
Anyway. Then the transmission decided to actually reverse, go figure. Just another oxidized episode I guess.
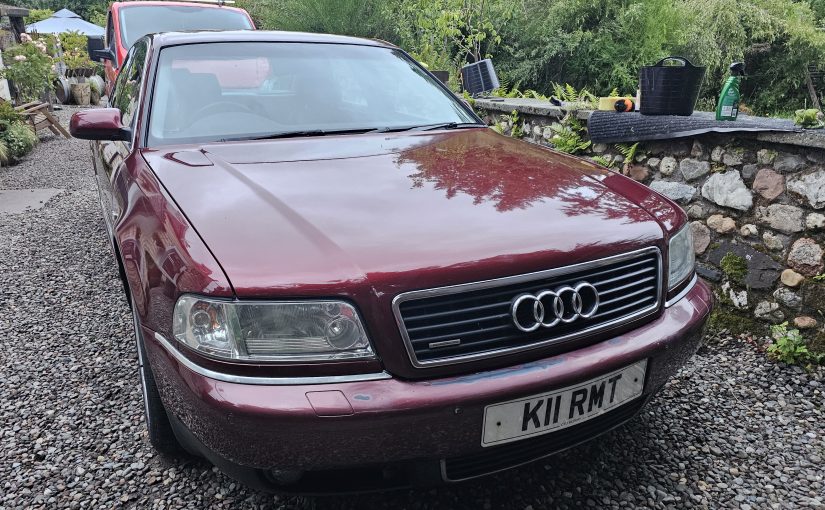
Wipers
First job working out the wipers or lack thereof, removed the wipers unit from the car. One of the the motor brushes was not connecting. Gave it a good clean and the motor and gear work as intended but the gearbox was making a whirring noise. Ordered a cheap compatible motor with different connector. Had to open the old gearbox to figure out the way it worked, then trial and error to make the new motor work the same way, quite easy when you know how!
Then the mechanical side of it had to be modded also.
Plenum
The plenum which sits in front of the windscreen and contains air intake and more importantly the ECU box, was filled up with tiny polystyrene balls caused by the house roof being insulated with that stuff years ago, it was everywhere, and more than 6 months later, I still find them! In addition to this, lots of organic matter was also accumulated. It took me about 2 hours of using compressed air and vacuuming to get most of it, all drains were cleared.
ECU Box
The ECU box was very worring, there were traces of moisture and the ABS ECU was showing great signs of water oxidation, Thanks to the great folks at audiworld.com Forum for their recommendations to double my efforts I think I might be able to get to the bottom of the issues plaguing the electrical gremlins. I spent a whole day de-oxidizing all the ECU box connectors and sockets (a total of 18 of them!),
How to clean heavily oxidised connectors?
- Take white vinegar and a load of table salt (saturated, which means cannot dissolve anymore) preferably warm.
- Dip or brush connectors one by one in the solution for about 15 minutes
- Neutralize the acid with warm water with lots of baking soda, again to saturation,
- Compressed air dry
- Optional contact cleaner
Resulting in a car starting (almost, see below) and all engine and Transmission Faults cleared and staying so!
However, I still was facing issues regarding the main relay which prevented the car from starting, strong smell of fuel, wiggling relays in the passenger foot well remedied the situation, probably doing the same clean up exercise there would definitively help also.
Few issues still, the orange rubber seals on the box marked “Benzin” in the ECU box was giving me trouble and had to smother them both with silicone to facilitate the connectors’ insertion, as they were losing their shape when inserting the connectors.
The surrounding rubber seal of the ECU cover does allow water to seep through at the cabin side due to the fact that this cover slots into catches and does not seem to provide good seal, my tip: add atop layer of plastic sheeting slide it between the lower windshield frame and said box half way to the front and tape it on on the forward side, so far seems to sort the water ingress.
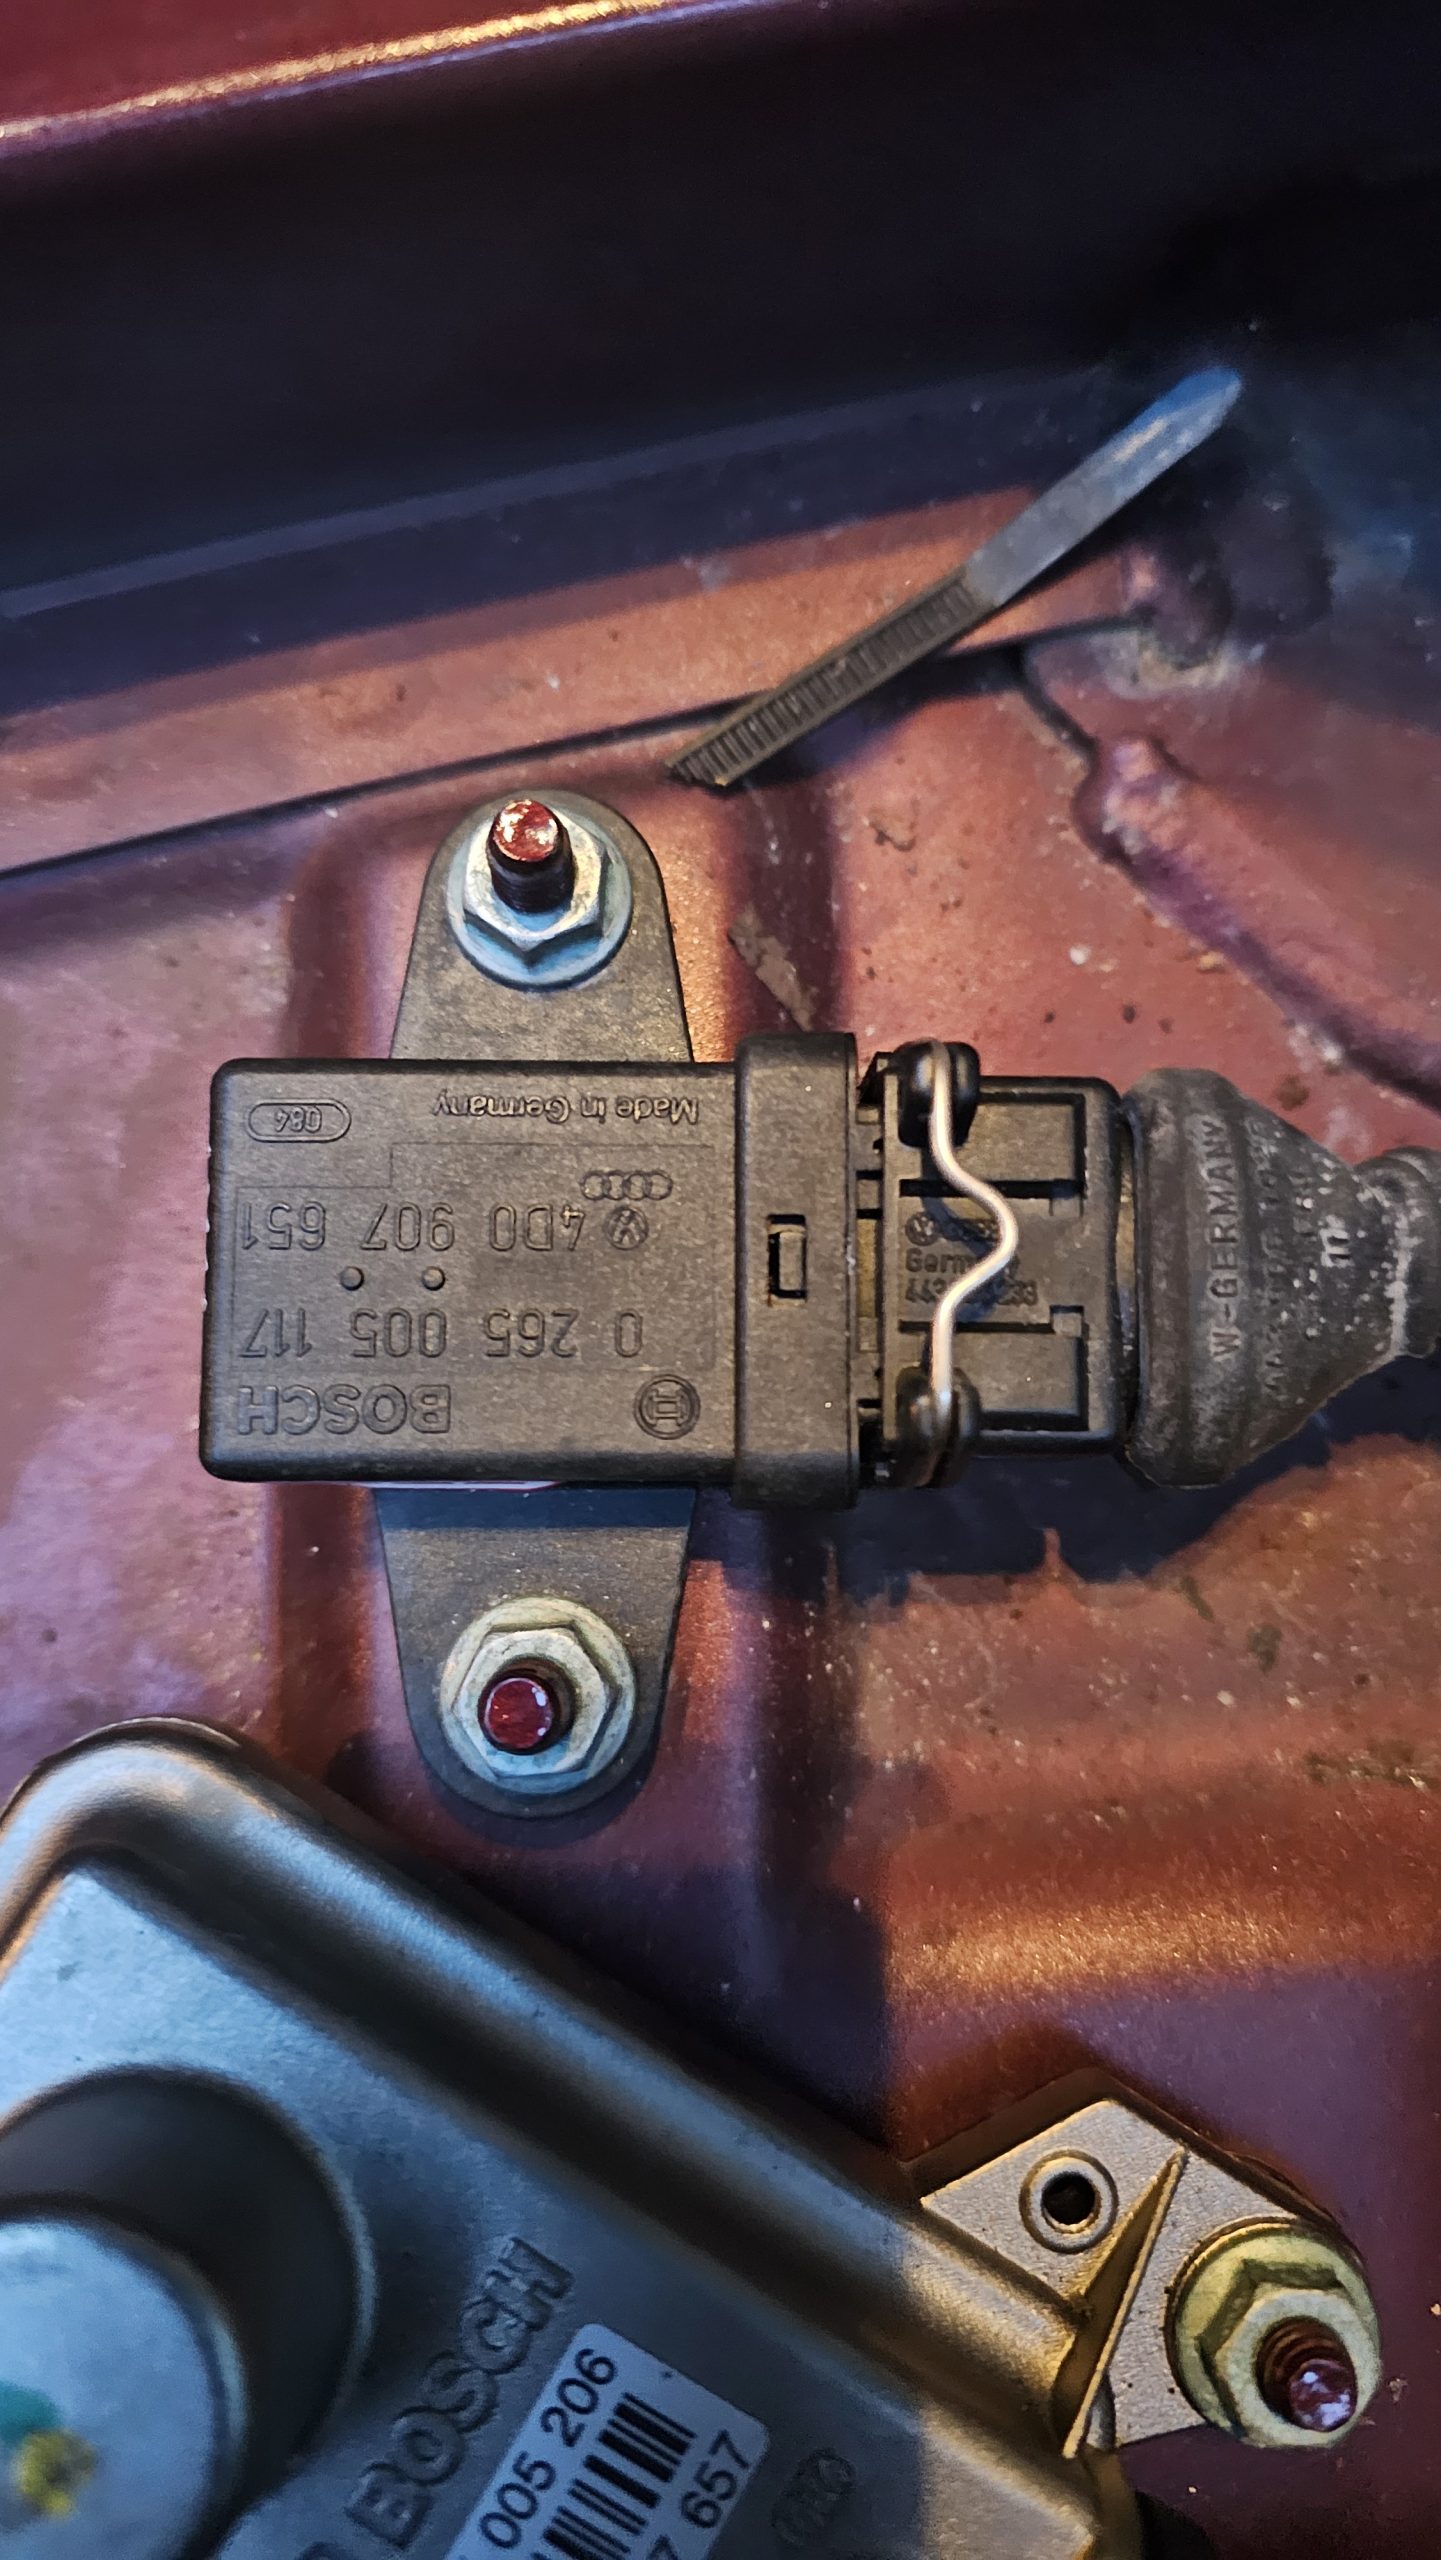
The only fault remaining after is the “606 rotation rate sensor-Faulty” which is the black thing under the passenger seat, ordered a second hand one from Latvia and voila! ABS light cleared!
I also had to get a new ABS ECU, a lot of problems got fixed after replacing it. The internal hadn’t aged well. Some Ebay purchase for £1`1.99 later and all seem good, although some gremlins have resurfaced (link here) as I tried to replace the alarm ad this somehow messed up the 5V line…. more to come on this. If the SECOND alarm eventually turns up.
Botang’s Hole!
For those in the know, this has to be the weirdest bit of Teutonic engineering I ever got to face ever. Mr Piesch, were you on holiday that day? How could you let this slip up. Basically the Botangs hole is a opening located in the back of the plenum under the AC piping (and for a RHS steering), under the ECU box, that is covered by a bit of card board painted over, that’s it! Over time, this cardboard fails and water penetrates in the cabin, on the footwell electrics, like relays and connectors making the whole left hand side of the car footwell under the carpet a swimming pool!
Proceeding to patch that hole completely eradicated the problem, except that there is also the issue with blocked AC drains by the transmission tunnel, on both sides. Yet another German engineering blunder, probably a Friday afternoon design devised around the pilsner Keg Ach, as the car had sat for 9 years, there was a lot of debris in the air system, which translate to hearing the sea when the fan is running and the passenger getting a foot shower when turning sharply to the right. The easiest side to drain the excess fluid and clean the pipes is on the left hand side, bearing in mind there is a drain on the left also! Bah. Whassever.
Still, had to contend with moisture under the rear left passenger carpet, I still don’t know where the water came from, perhaps the door seal is not too good, but it is not overly worrying, everything is dry where it matters now.
Sunroof
The sunroof was not working, the button does nothing, all I hear is a click, I tried to help the rood by nudging it from inside and outside, all I can hear is a “click”. It now works. But I had to do a manual override it was quite hard to get it unstuck. Doing so I managed to strip the 4mm Allen bolt using a impact river, I since discovered that tool to manually overide is in the fuse box cover located in the footwell.
I still to this day have water ingress when the car is parked facing up a slight hill, must be the rear drains that are quite difficult to reach, am thinking putting Tees on each side of the rear pipes in the boot (once you remove the side covers they appear, I fin d the system at the end of each drains to be a mystery as to why they thought this was a sort of clever way to end them, they seem to get clogged so easily. I tried to have a go at them from the inside at the rear of the car but all I managed to achieve is ripping the lining from the roof off the substrate and now have a sagging liner 🙁 I need to find out about clearing drain holes but it is not an overly big problem IMHO.
HVAC drainage
What is this idea following the sunroof and front plenum draining system also badly affects the HVAC drains, especially after a long period of standing still, dirt accumulates in the bottom of the HVAC pan and the drains gets easily blocked, there are two drain on other side of the transmission tunnel, it is well documented, but I fail to understand the logic in creating bottlenecks for dirt to get stuck into and having to do a manual clean every now and then, still thanks to the option though, If you do have blocked (and you will) drains, you end up with a rather annoying car pissing on your legs every time to turn sharply left or right. I decided to keep the left hand side trans tunnel cover off to ease access and monitor the clogging, so far after two episodes it seems to be OK. Since then I decided to hack into the lining so that I can have it back on. This way I can always drain the thing even with the cover on (photo coming). I also added a USB socket to the cover but I discovered that the glove box interferes with the plugged cables so either use 90 degrees angled socket adapters or move/recesss it somehow. (more to come).
Steering column adjuster
The electrical assisted steering column adjustment was totally stuck solid, not a movement to be seen, after working tirelessly for several hours I managed to free the system up and it is now working as expected. A video or two is better than a million words….
Rear transmission shaft seal
There was another problem regarding an oil leak reported on previous MOT back in 2016, transmission oil leak, this was the rear shaft transmission seal at the back of the gear box, new seal from Audi sorted it, no need to remove any catalytic exhausts, simply shove the prop shaft aside…
Long term trim, system too lean/rich
After fixing most of the technical issues, leading to an unexpected sailing through the MOT with a couple of minor advisories, my last sporadic issue was fuel trims, lots can be the cause:
- Faulty MAF sensor
- Faulty Fuel Pump
- Dirty fuel filter
- Dirty injectors
- Faulty O2 sensors
I proceeded to get a new MAF after many many other tests, like fuel pressure test:
Fuel filter replacement
fuel cleaner additive.
The problem is not too problematic, I drove 800 miles with a faulty MAF and the ECU corrected the fuel supply (lean) at around 15%, but best not to have this for ever as one get the EML (engine management light) on pretty much all the time.
I replaced the MAF with what I though was a compatible item only to discover that the EML turned back on as the engine was running to rich,; right the opposite(!).
Subsequently doing another 800 miles roundtrip to England running “rich” with EML on all the way. No ill effects.
I now have a correct MAF and all fuel trims are perfect!
Secondary Air Injection
The very last persistent problem I am still faced with throwing a EML is the SAI or Secondary Air Injection system, a nonsensical historical piece of technology that sparked the madness of modern cars ever race with “clean air” regulations that emblazon all new vehicles with excess weight, sadly but a necessary evil in this age of “we are all gonna die” mentality. Basically the SAI “blows” air into the Cats like blowing onto a fire to increase temperatures to make them work better at limiting pollutants exiting the tail pipes. What a silly thing only needed in cold weather when the engine is cold, something one will never e failing in the UK MOT tests as engines are well warmed up before any emission testing! So this can technically be deleted. However this causes the EML and ECU to react, and seemingly needs reprogrammed.
Trial and error.
Looking into this in more and more details led me to search far and wide on Forums, search engines and Chat engine, more specifically the fault was:
"17831 - Secondary Air Injection System; Bank 1
P1423 - 35-10 - Insufficient Flow"
Searched for Vacuum leak, solenoid fault, functions like the pump and such with an ouput test, finally the suck on the combi valves to simulate opening. That is where I located the fault, the Bank 1 valve was not opening, proper stuck shut. got a replacement for a couple of quid and voila!
Rear Seats
The rear seats and back rests had some serious cracking damage, the only option was to replace them. I got a set on Ebay for £79.99! and they’re heated, sadly I haven’t got the heating option at the rear, still considering it, looking to get a rear seat heating control unit to accommodate.